This semester I got the chance to teach a microbiology class here at Eastfield College. In lab we are studying fungi so, having some pretty cool microscopes at my disposal, I did some imaging for my class. So this blog will be slightly different since it is intended for my students, but it still has some pretty cool images - even if you aren't in my micro class.
In general, fungi are eukaryotic, unicellular or multicellular, heterotrophic, and have cell walls composed of chitin. (Chitin is also in the exoskeletons of insects and is what goes "crunch" when you step on a bug. The cell walls in plants are composed of cellulose and those in bacteria are composed of peptidoglycan - great test questions, by the way.)
There are lots of different types of fungi and they are everywhere. Watch any local weather report when they do the "pollen count", you will always see fungi. Rag weed may come and go with the season, but fungal spores are always present.
It is really kind of silly to include fungi in a "pollen count" since fungal spores aren't pollen. Pollen is the male gametophyte of plants and ultimately will result in the formation of two sperm cells that will fertilize the egg and the polar nuclei of the ovule to produce the embryo and the endosperm. Fungal spores are haploid cells that are produced by meiosis and are used to disperse the fungus. When they land in a suitable location they germinate and grow.
Yeast - Saccharomyces cerevisiae
The image below was taken by Dr. Tammy Oliver using a Leica microscope with a digital camera attached. This prepared slide shows the general morphology of yeast cells. The original magnification on this image is 1000x using oil immersion.
A prepared slide showing asexual budding. 1000x (oil).
Aspergillus
According to our lab manual,
Aspergillus is a Deuteromycota, which means that no sexual reproductive phase as yet been discovered. Of course, that doesn't mean that it doesn't reproduce sexually, just that no one has seen it. (Maybe it is shy.)
Aspergillus reproduces asexually by forming conidia (conidium, singular) on conidiaphores. In our prepared slides the conidia are grouped in what appears to be a sporangium, but it isn't, so be careful.
Hyphae are composed of cells that are connected together, end to end. They may be separated from each other by internal cross walls, in which case they are called septate hyphae. If they don't have cross walls they are aseptate hyphae. Even if they have cross walls, those cross walls are very porous allowing the sharing or cytoplasm and organelles, including nuclei. In essense, the hyphae are long continuous cells with multiple nuclei. This condition is called a syncytium.
In the image below you can see the mass of hyphae that make up the mycelium, or body of the fungus. I have also indicated a conidiophore - the filament that holds up the structures that make the conidia spores. Raising the spores up above the mycelium helps them spread.
The image below shows the conidia and the conidiophore.
Dr. Tammy Oliver made the image below from a prepared slide. In this image you can see the conidia and some of the detail of the underlying structures.
Here is a closer look.
Eastfield has two scanning electron microscopes. We took the smaller, table top SEM into the microbiology lab today to allow the students to see it in action. The images of Aspergillus were taken during lab using a Hitachi TM-1000 SEM.
Aspergillus conidiophore and conidia. [500x]
Hitachi S-3400N [200x]
Hitachi S-3400N [440x]
Hitachi S-3400N [750x]

Conidia [2,010x]
Conidia spores [1,200x] Image made during lab.
Conidia spores [6,000x]
'
One of the cool things about SEMs is that you can make calibrated measurements directly on the image. On the image above you can see that these fungal spores are about 4 microns in diameter.
Rhizopus nigricans
Some time ago I brought a piece of moldy bread into the lab for imaging. This was a specialty bread baked by my local grocery store which meant it didn't have any preservatives added. It molded beautifully.
First let's take a look at images made with the digital dissecting scope.
Most people think of moldy bread as pretty disgusting, but once you see it under a microscope the colors and structures are pretty amazing. Unfortunately, I don't have the luxury of a prepared slide to tell me what I am seeing, but I am pretty sure the the black sporangia (spore-forming bodies) are black break mold -
Rhizopus nigricans and the white mold in the middle with green under it is
Penicillium.
Sporangia of Rhizopus nigricans
Green and white mold of Penicillium
Notice the edge of the white mold just below the yellow You can begin to make out the conidia and conidiaphores of Penicillium.
In the center of the image you can clearly see the white, branching conidiaphores of Penicillium.
More white conidiophores (I seem to be obsessed!!)

Conidia and conidiaphores on moldy bread. The pebbly substrate is bread! [500x]
Conidiaphore and conidia [2,010x]
[1,200x]
To make the images below I cut a cross section through the moldy slice of bread. In fact, you can see the voids caused by the production of carbon dioxide during fermentation. The bread is to the left with the mycelium of the fungus above.
Bread and mold [73x]
Bread on bottom left corner. Hyphae and mycelia above. [200x]
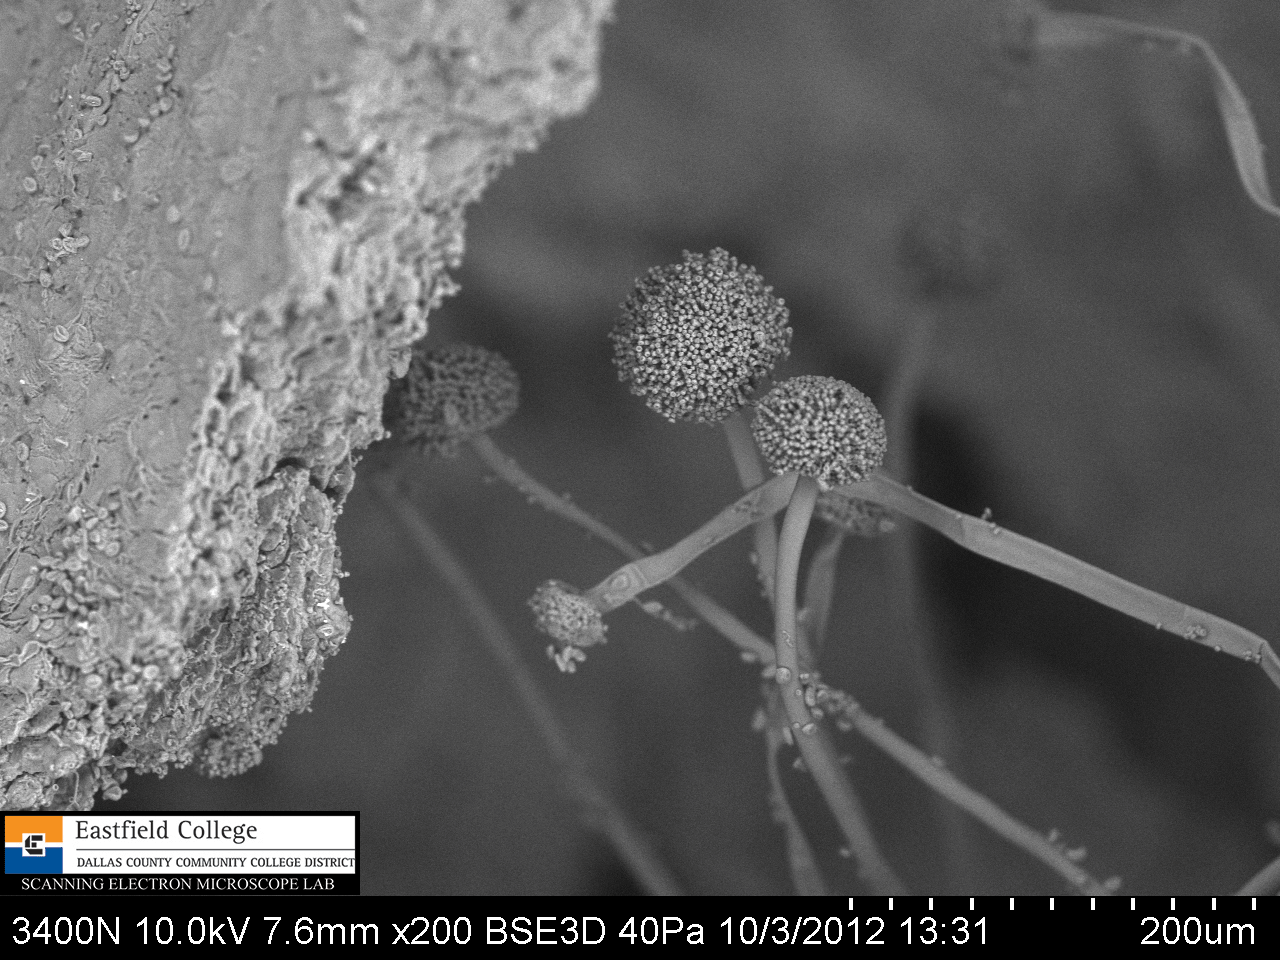
Sporangia and sporangiophores of Rhizopus [27x]
Sporangia and sporangiophores [50x]
The funciton of sporangiophores is to get the sporangia up above the surface of the bread so the spores can spread more easily. [50x]

[250x]
Zygospores [2,010 x]
Basidomycota - the mushrooms
These first images were made by a student on the table top SEM.
.gif)
This image shows a gill from under the cap of the mushroom. You can clearly see that the basidiospores occur in groups of 4. They extend from a club-shaped basidia which give this groups its name. [200x]
Basidiospores in groups of 4 [800x]
From a prepared slide - a cross section through the stalk and gills of a Coprinus mushroom.
Prepared slide. Original magnification 1,000x (oil)
Prepared slide. Detail showing basidium and basidiospores. Original magnification 1000x (oil)
WOW. That is a lot of fungi and hopefully the images are interesting and will be useful to my students. This is the first time that I have included images from 4 different microscopes - the TM-1000 SEM, the S-3400N SEM, a digital dissecting scope, and a digital light microscope, which I think is pretty neat.
As always, I would appreciate any feedback on the blog.
Eastfield College Microscopy Lab
Eastfield College
Mesquite, TX

 Living yeast cells at 400x taken with a Leica microscope with a digital camera attached. The red arrows show budding, an asexual process in which the parent cell copies it nucleus and then the bud, or daughter cell, grows out of the side of the parent cell.


.gif)


.gif)
.gif)


.gif)
.gif)


.gif)
