Sometimes you find yourself in strange places.
My daughter is studying Criminal Justice and hopes to one day be a police officer. This, of course, entails the use of fire arms and, since I don't own a gun, I suggested she take some training and begin practicing at the local firing range. What I didn't realize is that in the state of Texas you have to be twenty-one to fire a handgun on a gun range - unless you bring an adult over twenty-one with you. That would be me.
So now, about every two weeks I find myself wearing safety glasses and ear protection and watching my daughter shoot - an experience that is a little scary and pretty loud. (Captain America in the short video below is actually my daughter in action. She is a very good shot.)
Wouldn't it be interesting to image one of her empty 9mm shell casings? Let's find out.
First a look at the shell casing on the dissecting scope.
On the end of the shell casing you can see where the pin on the hammer hit the primer. I also noticed a small mark on the edge of the shell which I believe is made when it is ejected. (Red arrows)
Could these be used to determine if two bullets were shot from the same gun? I am not a forensic scientist, but it seems it might be true.
In the image above I added two lines. The shorter line is from the middle of the pin strike through the apex of the hemispheric mark made by the pin. The longer line is from the center of the pin strike to the ejection mark on the edge of the casing. Notice that the angle formed is the same on all three which were fired from the same gun.
[8x]
The same view with the scanning electron microscope shows that the firing pin pushed some metal out - the hemispheric shape above the circular strike impression. The ejection mark is visible between the "G" and "E".
[23x]
The 9MM label impression on the bottom of the shell casing. The SEM makes this look like it comes up above the shell. In reality it has been stamped into the metal - depressed.
[45x]
[50x]
[320x]
A close up of the "M". What looks very smooth and neat with the naked eye is actually pretty ragged.
[18x]
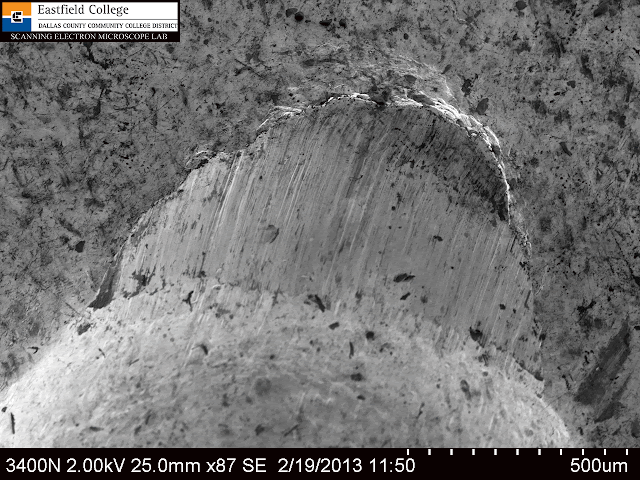
The firing pin made a depression into the metal of the primer.
[40x]
In this image you can see that the firing pin pushed some metal around.
[87x]
[196x]
A close up of the mark made by the firing pin.
[75x]
Ejector mark on side of casing.
[170x]
[5x]
In this image you are looking straight down into the empty shell casing. In the center of the image you can see where the primer exploded. You can also see small fragments of metal left behind.
[12x]
A closer look at the bottom of the inside of the casing.
[32x]
Center of shell showing the three-part structure underneath.
[142x]
Close up of the bottom center. You can clearly see the effects of the firing explosion, including scoring and left over blobs of melted metal.
[30x]
This image shows the upper rim of the casing and some of the inside surface. These grooves were probably made as the shell was being assembled.
[94x]
More grooving.
[90x]
The top edge of the empty casign. Notice the blob of metal in the center of the image.
[350x]
More blob.
[2320 x]
An up close and personal look at a small blob of what I assume is lead that melted during firing.
This definitely isn't my usual close look at biological specimens, but I couldn't pass up the chance to image something that is normally outside of my daily experience.
I have to admit that if my daughter does become a police officer, I hope the only time she has to fire her weapon will be at the firing range.
To all those in blue who serve and protect us each and everyday, many, many thanks. Be safe out there.


No comments:
Post a Comment